

Farmer’s Carries for Swimmers: Which Variation Should You Use?
/A weight in each hand and a short walk can look almost too simple to belong in a swimmer’s strength program. Add enough load, though, and every step asks a useful question: can you keep your body organized while your arms support the weight?
That is what I want swimmers to practice with loaded carries. The goal is to maintain posture, control your trunk, and hold the intended arm position while you move. More weight only helps when those qualities stay intact.
Start with a bilateral farmer’s carry for general strength and grip endurance. Choose a unilateral carry to challenge sideways trunk control, a rack carry to change the loading position, or an overhead carry when you can comfortably control weight above your head. Mixed-position carries add another option once the simpler versions are consistent.
Farmer’s Carry vs. Farmer’s Walk: Is There a Difference?
Farmer’s carry and farmer’s walk usually describe the same exercise: walking with weights held at your sides. In the standard bilateral version, you carry one weight in each hand.
“Loaded carry” is the broader category. It includes suitcase carries, rack carries, and overhead carries, or the infamous yoke carry! Coaches sometimes use “farmer’s carry” loosely for this whole family, but the position matters when selecting your exercise.
A farmer’s hold or march is different: you hold the weights without walking. It is an option when space is limited, although removing the steps changes the balance and trunk-control demands.
Farmer’s Carry Muscles Worked and Benefits for Swimmers
Carries involve several muscle groups working together:
| Muscle group | Main job during a carry |
|---|---|
| Hands and forearms | Maintain your grip on the handles |
| Abdominals and obliques | Help control trunk position as you step |
| Spinal extensors | Help maintain an upright torso under load |
| Shoulder and shoulder-blade muscles | Support and control the loaded arm position |
| Glutes and legs | Produce the steps and stabilize your pelvis |
The emphasis changes with load placement. A suitcase carry pulls you toward one side. An overhead carry asks you to control an elevated arm position. Neither is automatically better; they solve different training problems.
Research comparing carries, stationary holds, and planks found different trunk-muscle activation patterns across exercises. Walking increased activation in the measured back muscles compared with matched holds, while the plank produced more rectus abdominis activation than the carries. Carries complement other trunk exercises rather than replacing all of them.[1]
For swimmers, I use them to practice maintaining alignment under load and to build tolerance for supporting weight. These are general strength qualities. A loaded carry does not reproduce the catch, and stronger grip alone does not guarantee better propulsion. You still develop those skills in the water.
The practical benefit is that carries offer a simple, adjustable way to add strength work without a long exercise setup. Choose the position that addresses your goal and keep enough energy for your swim training.
Need help fitting dryland around your pool sessions? A Train Daly custom program can organize your strength work around your events, available equipment, and weekly swim schedule.
Which Carry Variation Should You Choose?
| Variation | Main emphasis | When to use it |
|---|---|---|
| Bilateral farmer’s carry | Grip endurance and upright load carriage | A straightforward starting option |
| Unilateral farmer’s carry | Resisting sideways trunk bending | When you want a one-sided loading challenge |
| Kettlebell rack carry | Supporting weight in front of the torso | When you want more core and arm loading |
| Double overhead carry | Controlling both arms overhead | For overhead mobility and stability |
| Hi-low carry | Controlling different arm positions together | After suitcase and overhead carries are comfortable |
| KB rack-hi carry | Combining rack and overhead support | After both positions are consistent separately |
| Carry to technical failure | Sustaining grip and posture under fatigue | An occasional conditioning method for experienced lifters |
1. Bilateral Farmer’s Carry: Start Here
Watch:
Hold a dumbbell or kettlebell in each hand, with your arms at your sides. Stand tall and walk with controlled, natural steps.
Keep your ribs roughly over your pelvis, look ahead, and let your arms hang comfortably. Avoid forcing your shoulders down and back or rushing to finish before your grip gives out.
I like this as a starting point because you can adjust the load without changing the task. End the set when you begin leaning, shuffling, or losing control of the handles.
2. Unilateral Farmer’s Carry: Resist the Sideways Pull
Watch:
Also called a suitcase carry, this version places one weight at your side. Walk without leaning toward the weight or overcorrecting away from it.
Use equal time or distance on both sides. If one side is harder to control, let that side determine the load and duration for both.
For a swimmer, the useful coaching focus is keeping the torso organized while the limbs move. This is a general control exercise, not a reason to eliminate the rotation you need during freestyle.
3. Kettlebell Rack Carry: Change Where You Support the Load
Watch:
In a rack carry, the kettlebell rests near the front of the shoulder, supported against the forearm and upper arm. Keep your wrist close to neutral and avoid leaning backward to make room for the bell.
A single rack carry introduces uneven loading; a double rack carry places weight in front on both sides. Choose the version that matches your program and equipment.
Use a load that allows steady steps and breathing. If your lower back arches progressively, shorten the set or reduce the weight.
4. Double Overhead Carry: Earn the Position First
Hold a weight overhead in each hand and walk slowly while maintaining control. Start much lighter than you would for a carry at your sides.
Before adding steps, establish a comfortable overhead hold. You should be able to keep your arms overhead without pain, excessive back arching, or the weights drifting unpredictably. Allow your shoulder blades to move upward naturally; do not pin them down.
This variation can challenge overhead load control, but it does not duplicate a streamline. Keep a simpler carry if the overhead position is uncomfortable or difficult to maintain.
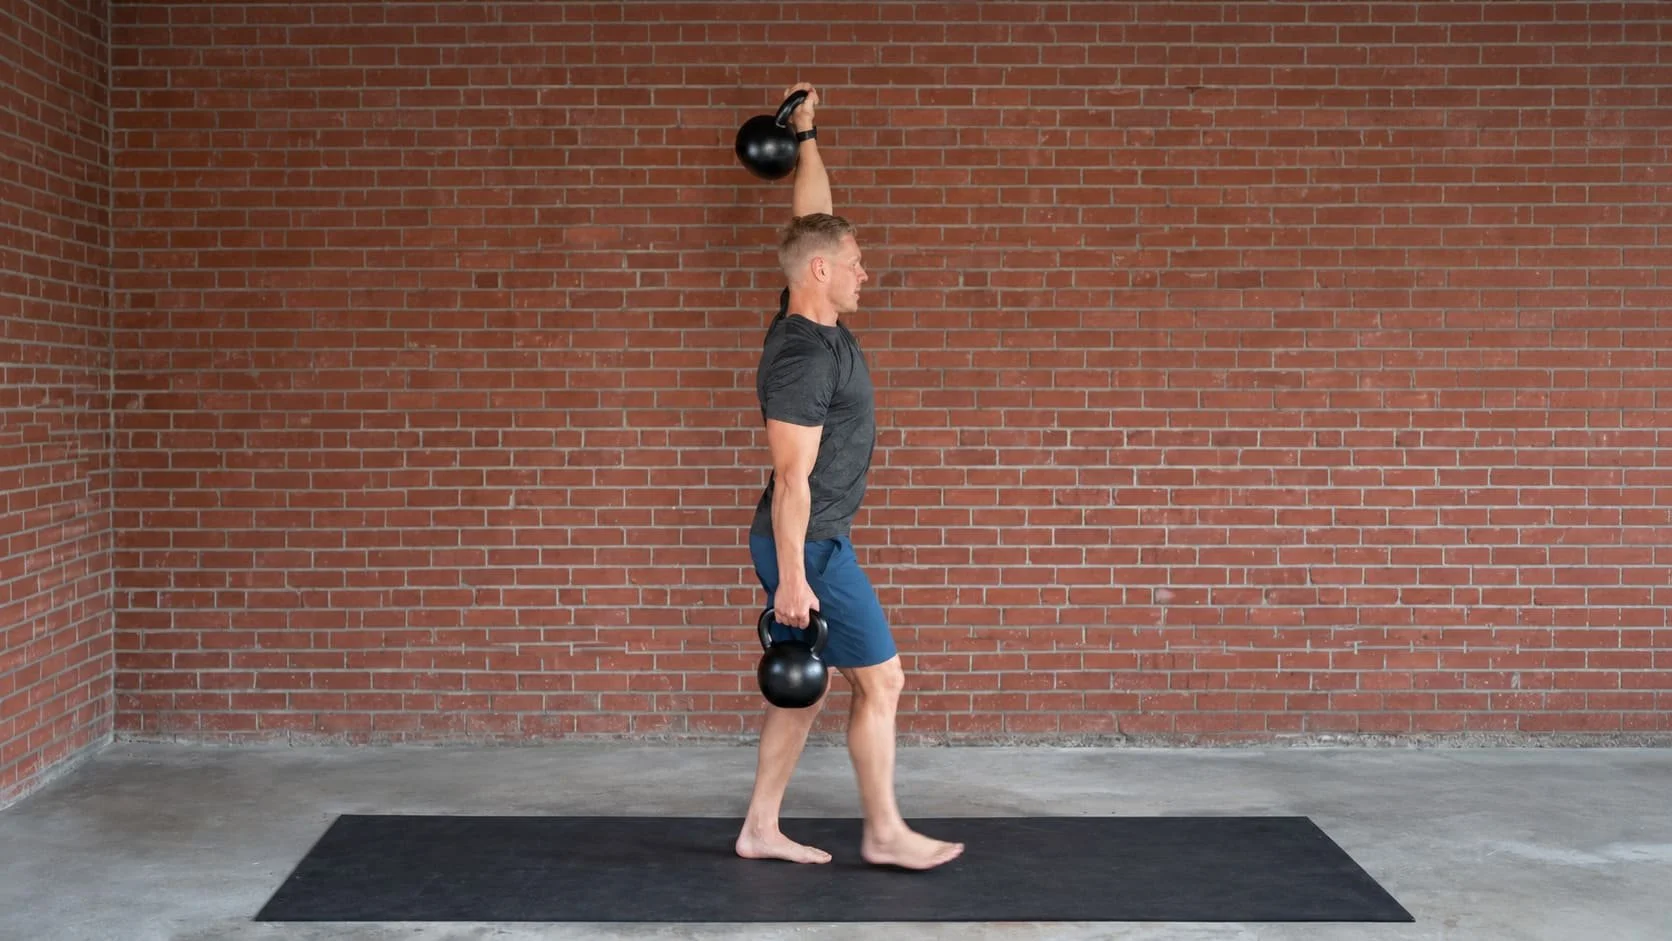
5. Hi-Low Carry: Combine Overhead and Suitcase Positions
Watch:
In the standard hi-low setup, one weight is overhead while the other hangs at your side. The two arms have different tasks, so choose each weight for its position rather than assuming they must match.
Establish both positions before walking. Keep the torso upright and switch arm positions between sets so both sides receive equal practice.
Use this when you already control suitcase and overhead carries separately. The extra coordination is useful only if it serves a clear training goal.
6. KB Rack-Hi Carry: Combine Rack and Overhead Positions
The standard rack-hi variation combines one kettlebell in the rack position with the opposite arm overhead. Maintain the rack without collapsing forward and the overhead position without leaning backward.
Begin with short sets and switch positions between sides. If either arm position deteriorates, return to practicing that carry separately.
This is an optional variation, not a progression every swimmer needs to reach. You can continue improving with bilateral and suitcase carries by adjusting load, distance, or consistency.
7. Farmer’s Carry to Failure: Change the Stopping Rule
“To failure” describes how long you continue, rather than a separate carry position. For swimmers, I would use technical failure as the stopping point: finish when you can no longer maintain the intended grip, posture, or walking pattern.
Do not keep walking until the weights fall from your hands. Use a clear route and set them down under control before grip failure becomes unavoidable.
Most sessions do not need this approach. Timed sets make workload easier to manage, particularly when you also have demanding pulling or sprint work in the pool.
How Much Weight Should You Use?
There is no single farmer’s carry weight that suits every swimmer. Training history, handle size, carry position, and duration all change the challenge. Choose the heaviest weights you can safely pick up and set down with control.
Choose a weight you can carry for 20–30 seconds with steady steps, controlled breathing, and consistent posture. Finish feeling that you could complete a few more good steps. Treat this as a practical starting prescription, not a research-established swimmer standard.
For example, you might trial a bilateral carry with 15-pound dumbbells in each hand. If it feels easy and your position stays consistent, increase gradually. If it changes your gait or posture immediately, reduce it. An overhead carry may require substantially less weight.
Progress one variable at a time:
Establish a repeatable load and duration.
Build toward 30 seconds with good control.
Add the smallest practical weight increase.
Shorten the duration again if necessary.
Record whether a listed weight means per hand or total. Two 25-pound dumbbells mean 25 pounds per hand and 50 pounds total. Want to build a complete routine around your kettlebells? My Kettlebell Strength Program for Swimmers helps you organize your dryland training to support your work in the pool.
Equipment and Farmer’s Carries at Home
Dumbbells and kettlebells work well for most carry variations. Dedicated farmer’s handles are another option for heavier bilateral carries, but swimmers do not need specialized equipment to begin.
At home, sturdy containers with secure handles can work for carries at your sides. Check that the handles can support the load and that the contents cannot shift or spill. Use proper exercise equipment for overhead work.
One weight is enough for suitcase carries. If you have little walking space, use a short clear route with slow turns or perform a stationary hold. Avoid repeated tight pivots with heavy weights. Marching in place is another option with a manageable load, although it changes the balance demands.
How to Add Carries to Your Swim Training
Begin with one variation near the end of a strength session, once or twice per week. You do not need all seven options in one workout.
| Session | Exercise | Starting dose |
|---|---|---|
| Strength session A | Bilateral farmer’s carry | 2–3 sets of 20–30 seconds |
| Strength session B | Unilateral farmer’s carry | 2 sets of 20 seconds per side |
Rest about 60–90 seconds between sets, or longer if needed to restore your grip and walking control. A set on each side completes one round of unilateral work.
Start at the lower end during busy swim weeks. Avoid introducing hard carries immediately before an important swim workout or competition.
Once the basics are consistent, you can replace a carry with a rack or overhead variation that suits your needs. Adding complexity is optional; maintaining useful strength work alongside quality swimming is the priority.
Excellence lives in the fundamentals. Pick a carry you can perform well, give it a clear purpose, and progress it without letting the gym take more than it gives to your swimming.
Author: Dan Daly, CSCS, swim and strength coach, TrainDaly founder.
Reference
- The Quantification of Muscle Activation During the Loaded Carry Movement Pattern. This study measured short-term muscle activation in healthy young adults; it did not test swimming performance improvements.